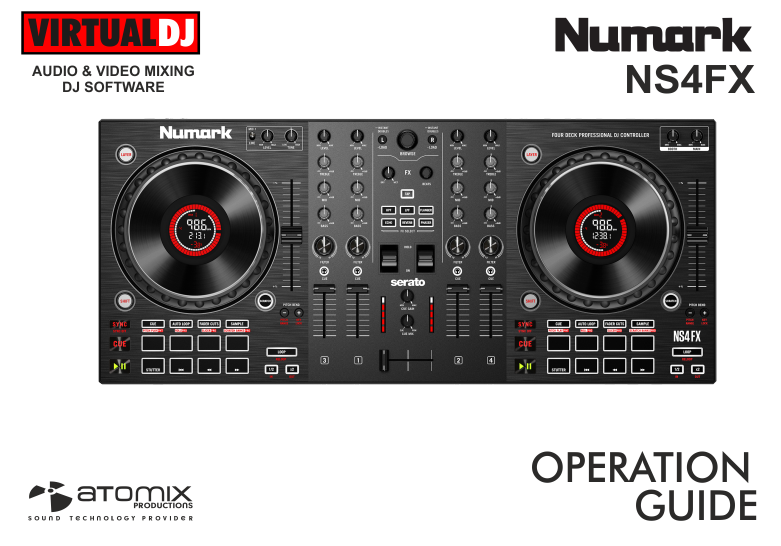
NUMARK NS4FX
SETUP
Step 1. Connections
Connect the NS4FX with your computer using the provided USB cable.
Connect your speakers to the rear Master Output using proper RCA or XLR cables and your Headphones to the front socket.
Step 2. Drivers
No drivers is necessary to be installed. Your Operating system will install the necessary drivers once the unit is connected to a USB port.
Firmware : At the moment this manual was written there was not any firmware update for NS4FX. However always check Numark's website for any possible Firmware updates. https://www.numark.com/product/ns4fx
Step 3. VirtualDJ
Install VirtualDJ from https://www.virtualdj.com/download/index.html (in case you have not done already)
Start VirtualDJ and login with your Account credentials.
A Pro Infinity or a Pro Subscription License is required. https://www.virtualdj.com/buy/index.html
Detection Window
A detection window will appear when the unit is first connected with VirtualDJ.
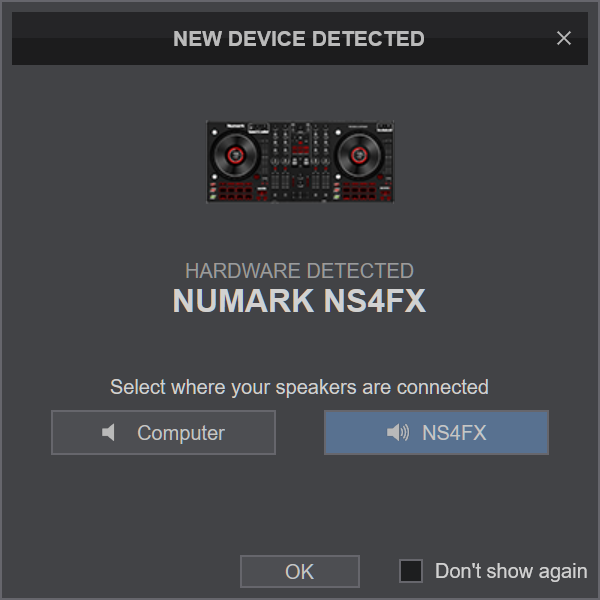
Choose where your speakers are connected and click to OK.
The NS4FX is now ready to operate with VirtualDJ.
LAYOUT
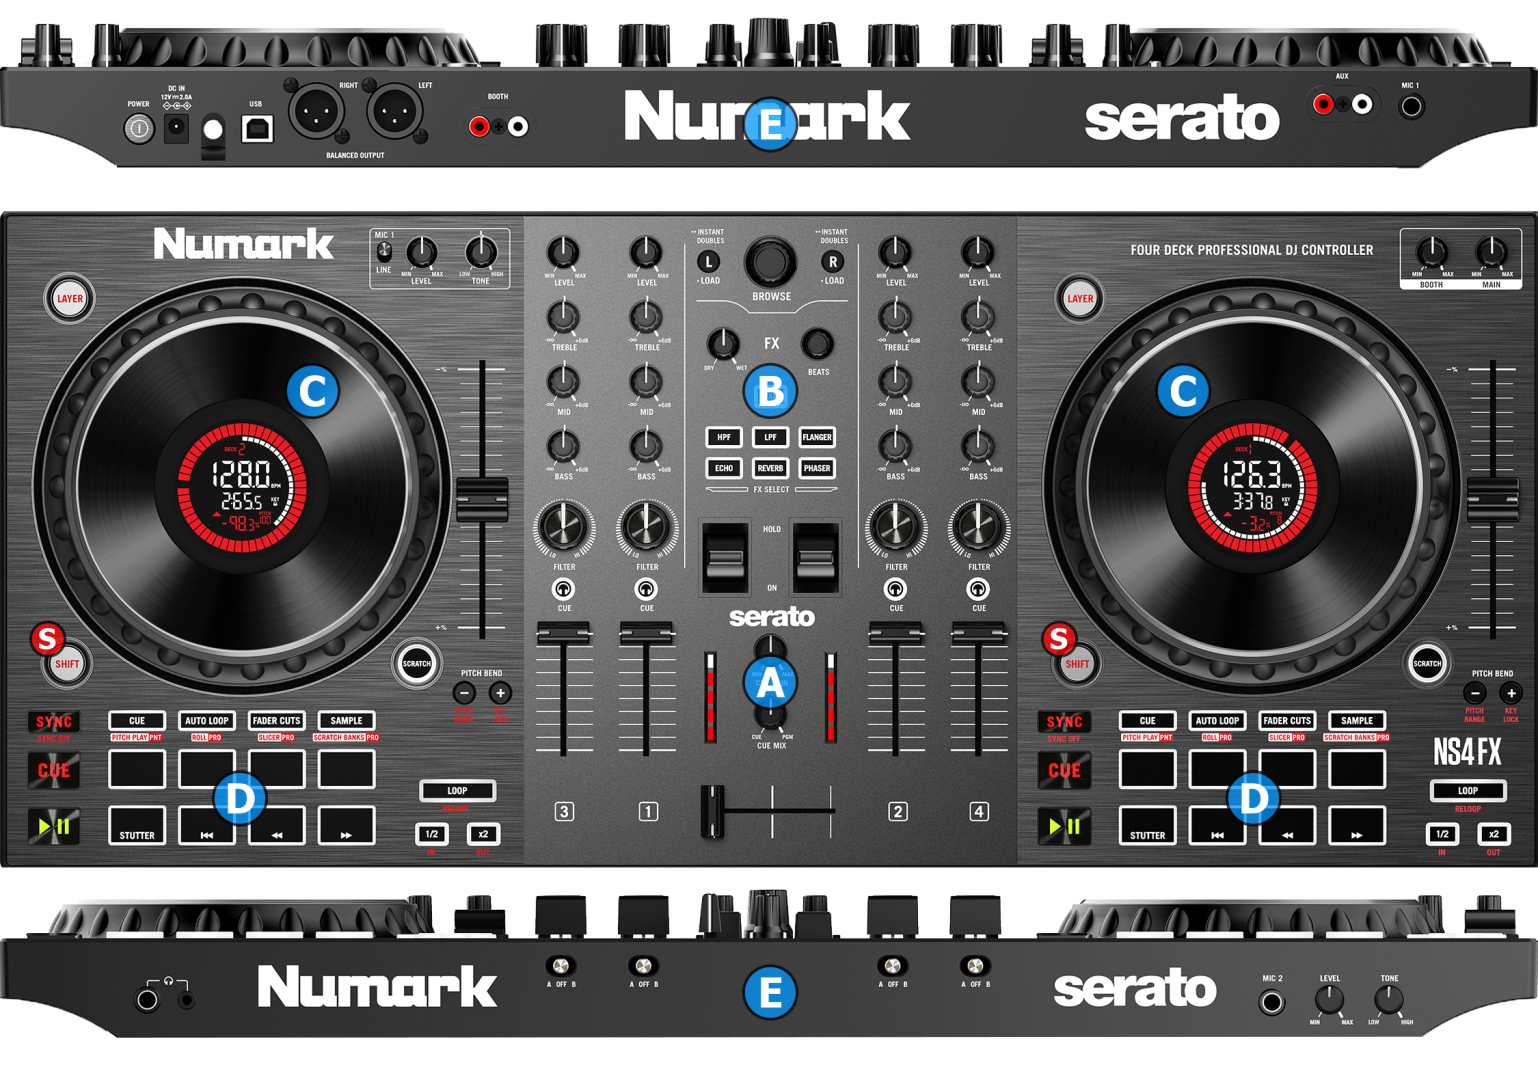
S SHIFT. Hold this button down to access secondary functions of the Numark NS4FX
The functionality of each button, knob and slider per section (as shown in the image above) will be explained in detail in the following chapters
A. Mixer & Browser Controls
B. Effects
C. Deck Controls
D. Performance Pads
E. Front & Rear Panels
MIXER & BROWSER CONTROLS
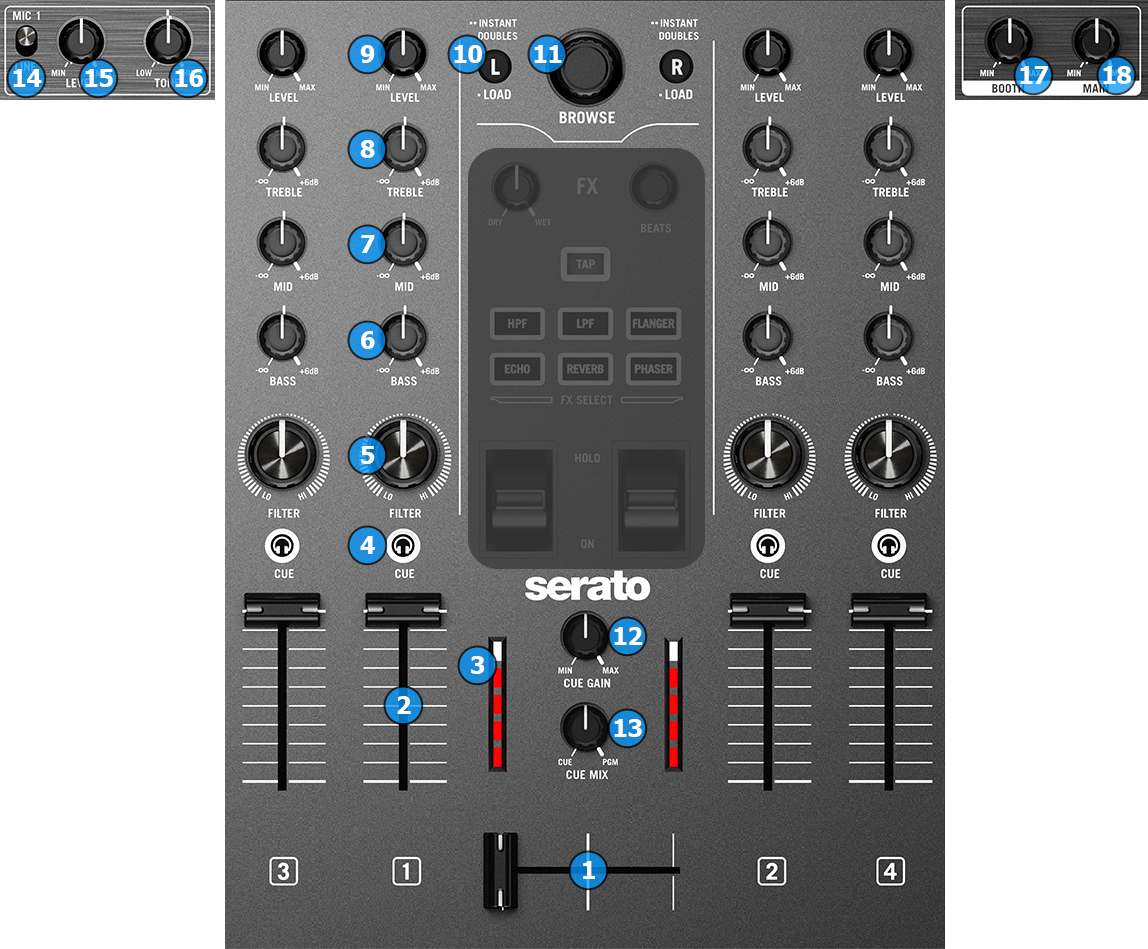
ACTION
SHIFT (SECONDARY) ACTION
Push to toggle focus between Folders and Songs List
Send audio signal from the Decks that have their PFL enabled to the Headphones channel when in CUE (left) position.
Blends the above audio signals when in all other positions.
* Note: The Microphone inputs along with the AUX input of the NS4FX are directly routed to the Master Output of the device (hardware operation) and they are not part of the USB Audio interface. Therefore they cannot be recorded, used for broadcasting or controlled in any way from VirtualDJ. The MIC level knobs are not sending any MIDI messages and cannot be mapped to any VirtualDJ actions.
EFFECTS
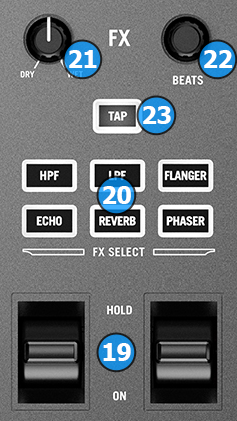
KEY
ACTION
SHIFT (SECONDARY) ACTION
DECK CONTROLS
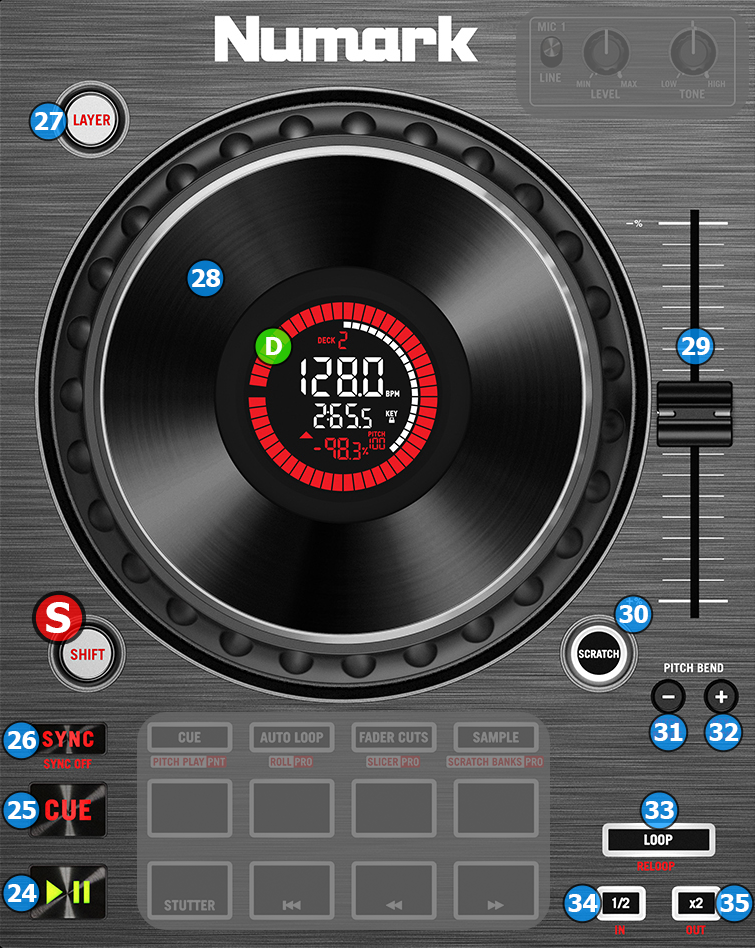
KEY
ACTION
SHIFT (SECONDARY) ACTION
Jumps and stops to the Cue point when deck is playing
In Scratch mode (SCRATCH button lit), use the top side of the jogwheel to scratch and the outer side to bend (temporary slow-down/speed-up).
In Bend mode (SCRATCH button unlit), use the jogwheel to bend (temporary slow-down/speed-up)
In Loop In/Out Adjust modes , use the jogwheel to fine-adjust the Loop In (Start) / Loop Out (End) points of a manual loop.
LCD JOG Display
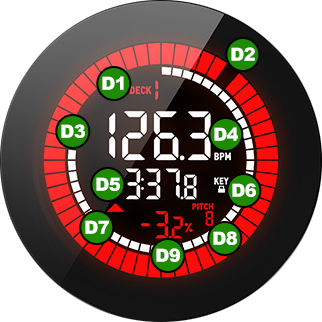
DISPLAY
DESCRIPTION
The up arrow will be displayed when Pitch has a negative value (track's speed lower than original)
None of the arrows will be displayed when Pitch is at the zero/middle position (track's speed equal to original)
The arrows will blink if the actual position of the Pitch fader and the software Pitch values don't match and will indicate the direction the hardware Pitch faders needs to be moved to, in order to catch the software value.
This may happen if the SYNC button is used.
PADS
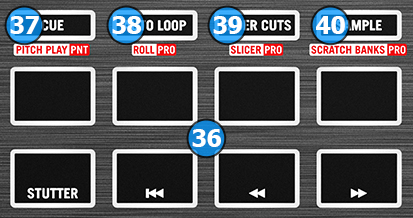
KEY
ACTION
SHIFT (SECONDARY) ACTION
FRONT & REAR PANELS
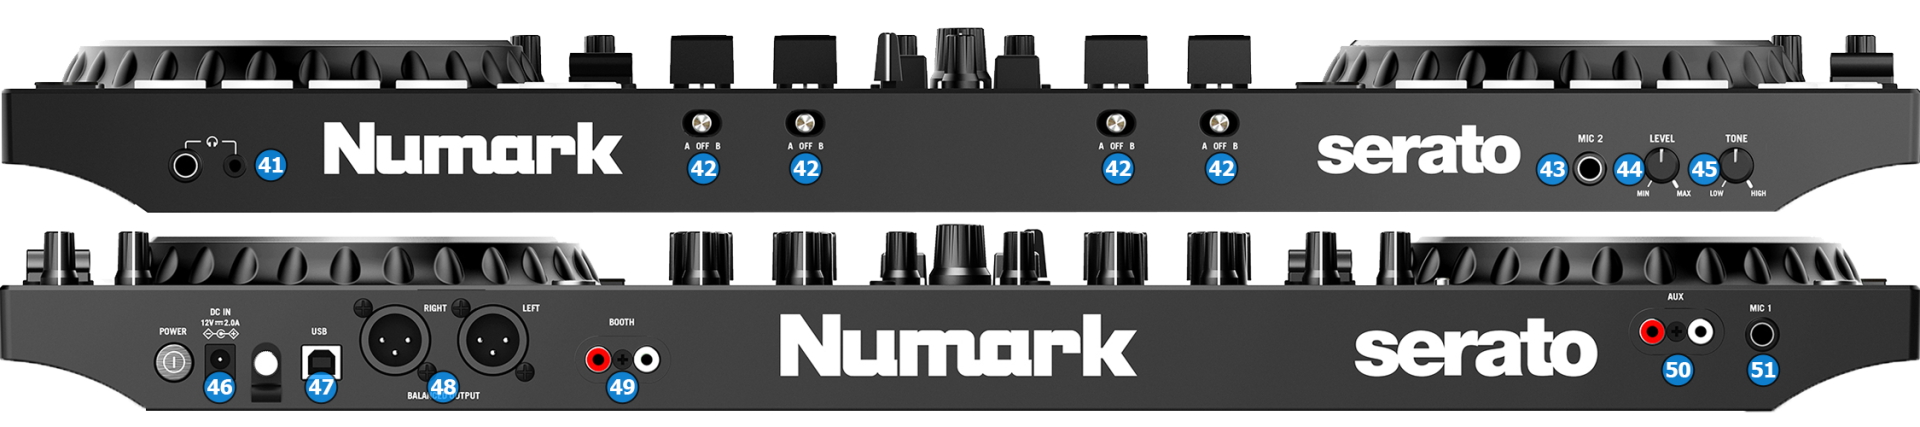
KEY
DESCRIPTION
* Note : The Microphone Inputs along with the AUX input are directly routed to the Master Output of the NS4FX. The inputs are not available in the USB Audio Interface, therefore they cannot be included in the Audio Setup nor can be recorded directly. However, recording your mix along with the Microphone Input is possible via Record LoopBack
